How to Change Your Minecraft Skin: Step-by-Step Guide
Customizing Your Avatar: Tips for Creating the Perfect Minecraft Skin
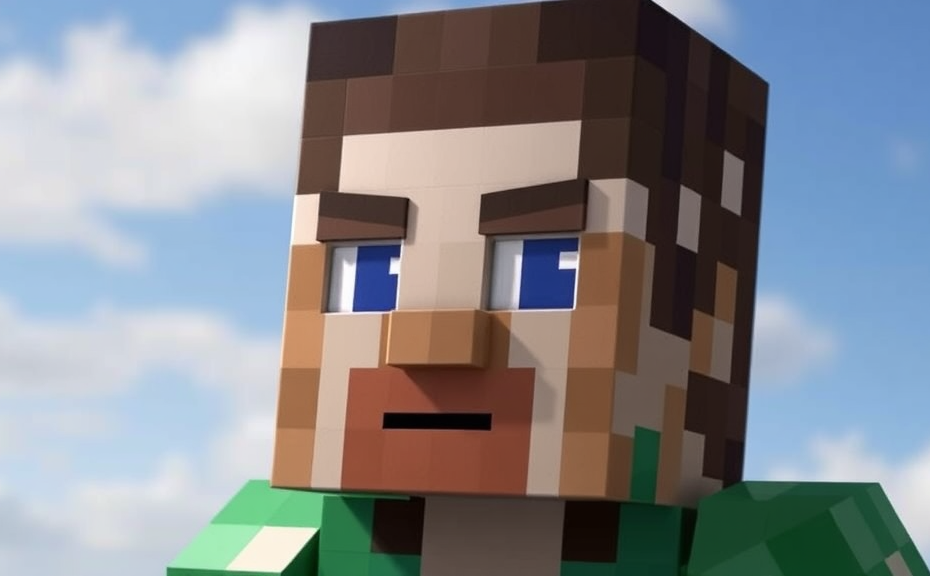
Changing your Minecraft skin can transform how your character looks in the game, making it more personalized and fun. Whether you want to create a skin that matches your favorite superhero or design one that reflects your own style, follow these steps and tips to customize your avatar perfectly.
To start, you’ll need a skin editor tool. There are several free options available online, such as MinecraftSkinStealer, SimplicitySkins, and MineTweaker Skin Editor. These tools allow you to upload your current skin or start with a blank canvas. Once you choose your preferred editor, here’s how to get started:
Step 1: Choose Your Skin Editor
Select a reputable skin editor that suits your needs. Each tool has its own interface and features, so pick one that feels intuitive to you. Some editors offer templates, while others give you more flexibility to create from scratch.
Tip: Look for tutorials within the editor to help guide you through the process.
Step 2: Upload Your Current Skin
If you already have a skin you like, upload it to the editor. Most tools allow you to upload images in PNG format, which supports transparency. This ensures your skin looks crisp and professional in the game.
Tip: Make sure your image is exactly 64×32 pixels for optimal results.
Step 3: Customize Your Skin
Once your skin is uploaded, you can begin customizing it. You can adjust the face, clothing, accessories, and more. Tools often come with layers, allowing you to add or remove elements easily.
Tip: Use guides within the editor to ensure your skin aligns properly.
Step 4: Save Your Customized Skin
After you’ve made your changes, save your new skin. Most editors will prompt you to save it as a PNG file. Keep this file handy as you’ll need it for the next step.
Tip: Always save your work periodically to avoid losing progress.
Step 5: Upload Your New Skin to Minecraft
Now it’s time to upload your new skin to Minecraft. Here’s how you do it:
- Go to your Minecraft profile page on the official website.
- Log in with your Mojang account credentials.
- Find the section where you can change your skin and upload your saved PNG file.
- Save your changes.
Tip: If you encounter any issues, make sure your browser is up to date and try clearing your cache.
Tips for Creating the Perfect Skin
- Keep it simple: Avoid overly complex designs that might not look good in-game.
- Pay attention to proportions: Ensure the skin fits well with Minecraft’s default character model.
- Be creative: Don’t hesitate to experiment with different styles and colors.
- Test your skin: Play around with your new skin in-game to see how it looks from different angles.
- Get feedback: Ask friends or fellow players for their opinions on your skin design.
Customizing your Minecraft skin is a fun way to personalize your gaming experience. With the right tools and a bit of creativity, you can design a skin that truly represents you. Remember to keep it simple, test it out, and have fun!
Whether you’re a beginner or an experienced player, changing your Minecraft skin can be a rewarding activity. Enjoy the process and let your imagination run wild!
Exploring Minecraft Skin Websites: Where to Find Unique Designs
In the vast world of Minecraft, changing your skin can be a fun way to personalize your experience and express your creativity. Whether you’re looking for something simple or something elaborate, there are numerous websites dedicated to providing unique skins for players. Here’s a guide to help you explore some of these websites and find the perfect skin for your character.
Before diving into the list of websites, it’s important to know how to change your skin once you’ve found one you like. In Minecraft, you can change your skin by accessing the settings menu. Navigate to Options > Skins, then choose “Upload New Skin” and select the skin file you downloaded from one of the websites listed below. If you’re playing on a server or using a modded version of Minecraft, the process might vary slightly, so always refer to the specific guidelines provided by the platform.
Popular Minecraft Skin Websites
There are countless websites where you can find unique Minecraft skins. Here are some of the most popular ones:
- SkinCrafter: Offers a wide range of customizable options. You can upload your own base skin and add various layers to customize it further. It’s user-friendly and great for those who want to tweak their skins down to the smallest detail.
- MineSkin: Known for its vast library of skins, MineSkin allows you to browse through thousands of pre-made designs. You can also generate random skins if you’re stuck for inspiration. It’s particularly useful for finding rare and exclusive skins.
- MinersNeedCoolShoes: Specializes in collecting and curating community-created skins. This site is a treasure trove for players who want unique, fan-made designs. It’s regularly updated with new contributions from the Minecraft community.
- SkinBase: Another comprehensive resource for Minecraft skins. It offers both free and premium skins, and you can filter your search based on categories like gender, color, and type (e.g., anime, fantasy). The variety here ensures you’ll find something that suits your style.
- Planet Minecraft: Besides skins, Planet Minecraft offers a wealth of other resources like texture packs, maps, and mods. Its skin section is extensive and includes a mix of professional and amateur creations. It’s a great place to explore beyond just skins.
Choosing the Right Skin
When selecting a skin, consider the overall aesthetic you’re aiming for. Are you going for a classic look, something more modern, or perhaps a character from another game or movie? Many websites allow you to preview skins before downloading, which can be incredibly helpful in making your decision. Additionally, think about how the skin will look in-game, especially when it comes to colors and visibility against the environment.
Downloading and Installing Your Skin
Once you’ve chosen a skin, the next step is to download and install it. Most websites provide direct download links for skins. After downloading, you can follow the steps mentioned earlier to upload it in Minecraft. Some websites also offer tools to edit or resize skins, which can be handy if the skin isn’t quite the right size or needs minor adjustments.
Tips for Customizing Your Skin
If you’re looking to create a truly unique skin, consider customizing an existing design. Many websites offer tools to do this online. You can change colors, add accessories, or even swap out entire parts of the skin. This level of customization can give your character a distinct look that stands out in the game.
Another approach is to collaborate with other players or designers. Some websites have forums or communities where you can share ideas and get feedback on your skin designs. This collaborative aspect can lead to innovative and personalized skins that reflect your individuality.
Don’t be afraid to experiment. Minecraft is all about creativity, and trying out different skins can be a fun way to discover new styles and inspirations. Whether you prefer a minimalist look or a bold, colorful design, there’s a skin out there that’s perfect for you.
The world of Minecraft skin customization is rich with possibilities. From classic designs to intricate works of art, these websites offer a plethora of options to enhance your gaming experience. By exploring these resources, you can find the ideal skin that reflects your personality and adds a personal touch to your virtual adventures.
Advanced Techniques: Modifying and Uploading Minecraft Skins
Changing your Minecraft skin can be a fun way to personalize your gaming experience. Whether you’re looking to match your character with your favorite superhero, adopt a unique look inspired by a popular meme, or simply refresh your appearance, custom skins offer endless possibilities. Here’s how you can modify and upload Minecraft skins to enhance your gameplay.
To start, you’ll need a skin editor. There are several free tools available online that allow you to create and edit skins easily. Websites like MinecraftSkins, SMPskins, and Planet Minecraft Skin Editor provide user-friendly interfaces where you can upload your current skin or start from scratch. These tools often come with tutorials and pre-designed templates to help beginners get started quickly.
Step-by-Step Guide to Modify Your Skin
Step 1: Choose a Skin Editor
- Select a reliable skin editor from the options mentioned above.
- Most editors let you choose between different themes and layouts, so pick one that suits your style.
Step 2: Upload Your Current Skin (Optional)
- If you already have a skin you want to modify, upload it by clicking the “Upload” button.
- This allows you to work based on your existing design while making changes.
Step 3: Customize Your Skin
- Use the tools provided to alter the face, body, and accessories.
- Most editors offer layers, allowing you to add or remove elements like hats, glasses, or even tattoos.
- Save your progress frequently to avoid losing your work.
Step 4: Save Your New Skin
- Once you’re satisfied with your design, save your new skin as a .png file.
- This format ensures the best quality and compatibility with Minecraft.
Uploading Your Modified Skin to Minecraft
After you’ve created your custom skin, the next step is to upload it to your Minecraft account. Here’s how:
Step 1: Log in to Your Minecraft Account
- Go to the official Minecraft profile page.
- Sign in with your Mojang account credentials.
Step 2: Navigate to the Skin Section
- On the profile page, find the section labeled “Skin.”
- Click on the current skin preview to access the upload options.
Step 3: Upload Your Custom Skin
- Select the “Choose File” option and browse to locate the .png file you saved earlier.
- Once selected, the file will automatically upload and apply to your profile.
Step 4: Confirm and Apply Changes
- After uploading, you may see a confirmation message or a prompt to save changes.
- Confirm the changes to finalize your new skin.
Tips for Creating the Perfect Skin
Creating a perfect skin involves more than just changing colors and adding accessories. Here are some tips to help you achieve a professional-looking result:
- Balance Colors: Use contrasting colors to make your skin stand out, but ensure they don’t clash.
- Pay Attention to Details: Small details like eye color, hair style, and facial features can significantly impact the overall look.
- Test in Different Environments: Preview your skin in various lighting conditions to ensure it looks good in-game.
- Consider Feedback: Share your design with friends or the Minecraft community to gather feedback and make improvements.
By following these steps and tips, you can create and upload custom skins that reflect your personal style and enhance your Minecraft experience. Remember, the key is to have fun and experiment with different designs until you find the perfect fit. Happy crafting!
Skin Sharing and Community: Engaging with Other Minecraft Players
Minecraft is more than just a game; it’s a vibrant community where players can share their creativity through custom skins. Changing your Minecraft skin is one of the first steps towards personalizing your gaming experience and making your character uniquely yours. But why stop there? Engaging with other Minecraft players by sharing your skins and exploring the creations of others can significantly enhance your gameplay and foster a sense of belonging within the community.
One of the simplest ways to share your skin is through the official Minecraft website. Here, you can upload your skin and make it available for others to download. This platform is not only useful for sharing but also for discovering new skins. By exploring the vast gallery of user-uploaded skins, you can find inspiration and ideas for your next creation. Remember, when sharing your skin, consider including a brief description or a link to your social media profiles so others can reach out and connect with you.
Creating and Uploading Your Skin
Before you can share your skin, you need to create it. There are several tools available online that allow you to design your skin. Websites like MinecraftSkinStealer offer easy-to-use interfaces where you can upload a base template and customize it to your liking. Once you’re satisfied with your design, save it as a .png file. Next, head over to the Minecraft website and navigate to the Edit Profile section. Here, you can upload your new skin. It’s important to note that Minecraft skins must adhere to certain dimensions (64×32 pixels) to ensure they look good in-game. If your skin doesn’t meet these specifications, the game will automatically resize it, which might distort your design.
Sharing Your Skin on Social Media
Another effective way to share your skin is through social media platforms. Platforms like Twitter, Instagram, and Reddit have dedicated communities where players share their custom skins. When posting your skin, include a high-quality image and a brief description. You can also include links to your Minecraft profile or other social media accounts to encourage engagement. Engaging with other players’ posts by commenting and sharing can help increase your visibility and attract more followers interested in your work.
Joining Minecraft Communities
Joining Minecraft communities is another great way to share your skins and connect with other players. These communities can range from forums and Discord servers to in-game groups. For example, Discord servers often have channels dedicated to sharing skins. Participating in these communities allows you to get feedback on your designs and learn from other creators. Additionally, you can discover new skins and gain insights into popular trends within the community.
When joining these communities, be sure to follow the rules and guidelines set by the moderators. Engaging respectfully and constructively can help you build a positive reputation and open doors to new opportunities. Many communities also host events and challenges, providing a fun and interactive way to showcase your skills and connect with fellow players.
Feedback and Improvement
Receiving feedback on your skin is crucial for improvement. When you share your skin, don’t hesitate to ask for constructive criticism. Feedback can come from various sources, including comments on social media, direct messages from other players, or even through in-game interactions. Embrace feedback as a tool for growth and use it to refine your designs. Over time, you’ll notice significant improvements in both your artistic skills and your ability to engage with the community.
Engaging with the Minecraft community through skin sharing is not just about showing off your creations; it’s about building relationships and contributing to a larger creative ecosystem. By actively participating in these activities, you’ll find that your enjoyment of the game deepens, and your connections within the community strengthen. So go ahead, share your skin, and see where it takes you!
Conclusion
Changing your Minecraft skin is more than just a cosmetic upgrade; it’s a way to express your creativity and stand out in the vast world of Minecraft. By following the step-by-step guide, you can easily switch skins and explore countless customization options. Whether you’re designing your own avatar or downloading unique skins from websites, the possibilities are endless. Advanced techniques allow you to modify and upload skins with precision, giving you full control over your appearance. Engaging with the community through skin sharing not only enhances your gaming experience but also opens doors to new ideas and inspirations. Embrace the opportunity to personalize your Minecraft journey, and let your imagination run wild with the perfect skin that reflects your unique style.