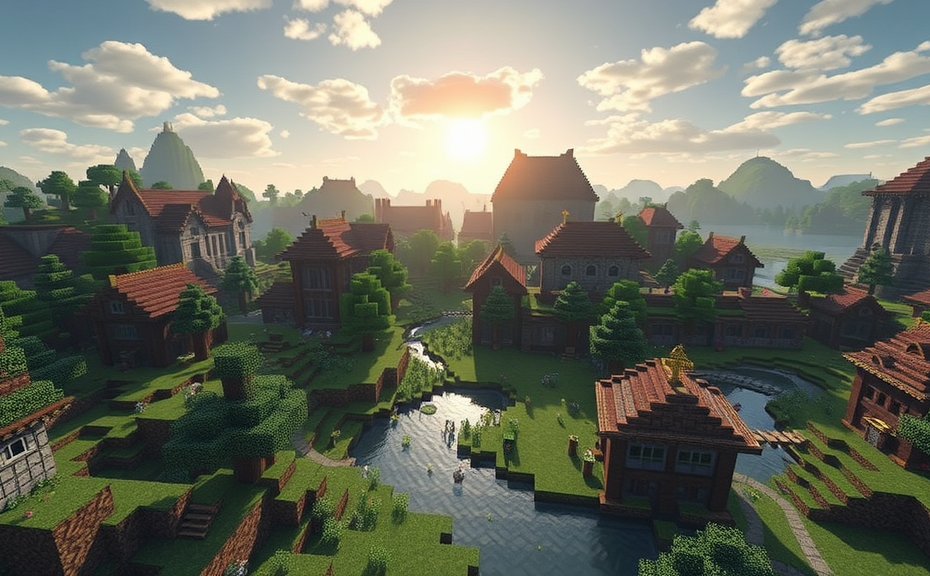
Minecraft is a game that has captured the hearts of millions around the world. One of the most exciting aspects of Minecraft is hosting your own server, allowing you to play with friends or a community of players in a shared world. If you’re eager to dive into the world of Minecraft server hosting, here’s how you can get started.
Choosing Your Server Hosting Platform
The first step in hosting a Minecraft server is choosing the right platform. There are several options available, ranging from free to paid services. Free platforms like Aternos offer a basic setup, while paid services like Apex Hosting or Shockbyte provide more robust features and better performance. Consider your needs—do you want dedicated server resources, or are you okay with shared hosting? Make sure to read reviews and compare features before making your decision.
Setting Up Your Server Software
Once you’ve chosen your hosting platform, it’s time to set up the server software. Most hosting platforms provide easy-to-use control panels that guide you through the process. Typically, you’ll need to download the Minecraft server files, which are usually available from the official Mojang website. Once downloaded, upload these files to your server using an FTP client or the provided file manager in your hosting control panel.
Configuring Your Server Settings
After setting up the server software, you’ll need to configure various settings to tailor the experience for your players. This includes adjusting the maximum number of players, setting up the game mode (survival, creative, etc.), and configuring plugins that enhance gameplay. For example, EssentialsX can add useful commands, while WorldEdit can help with building and editing the world. Make sure to test these configurations to ensure everything works as expected.
Installing Necessary Plugins
Plugins are essential for adding extra functionality to your Minecraft server. Popular plugins like EssentialsX, GriefPrevention, and WorldGuard can help manage player behavior and enhance gameplay. To install a plugin, simply download the plugin file from a trusted source, then place it in the plugins folder on your server. Restart the server to apply the changes. Be sure to check compatibility with your version of Minecraft and server software.
Connecting Players to Your Server
Once your server is up and running, it’s time to let others join. You’ll need to share the IP address of your server with your players. This information is usually found in your hosting control panel. Players can connect by launching Minecraft, clicking on “Multiplayer,” and entering the server IP. Optionally, you can also set up a domain name for easier access. This requires configuring your DNS settings, which your hosting provider can often assist with.
Maintaining Your Server
Maintaining a Minecraft server involves regular updates and monitoring. Keep your server software and plugins updated to the latest versions to ensure stability and security. Regular backups are crucial to prevent data loss. Many hosting platforms offer automated backup options, which can save you time and effort. Additionally, keep an eye on server performance and address any issues promptly to ensure a smooth gaming experience for your players.
Engaging Your Community
A successful Minecraft server isn’t just about the technology; it’s also about fostering a community. Encourage player interaction through forums, Discord channels, or in-game chat. Organize events and competitions to keep the game interesting. Regularly gather feedback from your players to understand their needs and preferences. This engagement will help build a loyal player base and keep your server thriving.
Tips for Optimizing Performance
- Optimize your server settings for the best performance. Adjusting settings like view distance and entity activation range can significantly impact server performance.
- Regularly monitor your server’s resource usage. High CPU or memory usage can slow down your server, so adjust settings or upgrade your plan if necessary.
- Consider using a lightweight server software if you’re experiencing performance issues. Some alternatives like PaperMC offer better performance than the default server software.
Final Thoughts
Hosting a Minecraft server can be a rewarding experience, offering endless opportunities for creativity and community building. By carefully selecting your hosting platform, setting up your server correctly, and maintaining it regularly, you can create a vibrant and enjoyable space for players to explore together. Whether you’re hosting a small group of friends or a larger community, the key is to stay engaged and responsive to your players’ needs.
Hosting a Minecraft server can be an exciting way to create a custom gaming experience with friends or a community. Whether you’re looking to set up a small private server or something more substantial, here’s a step-by-step guide to help you get started.
Choosing the Right Server Type
First, decide what kind of server you need. There are several types available:
- Dedicated Server: This type of server runs exclusively for your Minecraft world. It offers full control over configurations and plugins.
- Hosted Server: Many companies offer managed servers where they handle the technical aspects, allowing you to focus on gameplay.
- VPS (Virtual Private Server): A balance between dedicated and hosted, offering some control with less maintenance.
Consider your budget, technical skills, and how much customization you want.
Selecting a Hosting Provider
If you choose a hosted or VPS option, selecting the right provider is crucial. Look for providers that offer:
- Good uptime guarantees
- Responsive customer support
- Flexible plans
- High-performance hardware
- Easy setup processes
Popular options include Apex Hosting, Shockbyte, and CubedHost. Each has its own strengths, so read reviews and compare features before making a decision.
Setting Up a Dedicated Server
If you opt for a dedicated server, you’ll need to set it up yourself. Here’s a basic outline:
- Choose Your Operating System: Windows, Linux, or macOS. Linux is often preferred due to its stability and ease of use.
- Install the Server Software: Download the latest version of the Minecraft server software from the official website.
- Configure the Server: Edit the
server.propertiesfile to adjust settings like difficulty, game mode, and port forwarding. - Start the Server: Launch the server using the command line or a startup script.
Make sure your computer meets the minimum requirements and is kept running 24/7 for uninterrupted gameplay.
Managing Your Server
Once your server is up and running, managing it involves several tasks:
- Backing Up: Regularly back up your world data to prevent loss in case of crashes or other issues.
- Updating: Keep the server software updated to benefit from new features and security patches.
- Moderation: Set up rules and moderation tools to keep your community engaged and safe.
- Plugins: Install plugins to add new features and enhance gameplay. Popular ones include EssentialsX, WorldGuard, and GriefPrevention.
These steps ensure your server runs smoothly and provides a great experience for players.
Connecting to Your Server
To connect to your newly hosted Minecraft server, follow these steps:
- Get the IP Address: Find the IP address provided by your hosting service or generated by your server software.
- Join the Server: In Minecraft, go to Multiplayer > Direct Connect and enter the IP address.
- Port Forwarding: If you’re hosting locally, configure your router to forward the appropriate ports (usually 25565).
Ensure your firewall settings allow traffic on the necessary ports to avoid connectivity issues.
Troubleshooting Common Issues
Running a Minecraft server can sometimes lead to unexpected problems. Here are some common issues and solutions:
- Connection Problems: Check your IP address and ensure proper port forwarding.
- Lag and Performance Issues: Optimize server settings, upgrade hardware, or reduce player count.
- Data Loss: Implement regular backups and consider using cloud storage solutions.
Keep a log of errors and solutions for future reference. This can save time when troubleshooting recurring issues.
Expanding Your Community
Building a thriving Minecraft community requires more than just a well-run server. Consider these tips:
- Promote Your Server: Share your server details on social media, forums, and within Minecraft communities.
- Engage Players: Encourage feedback, host events, and maintain a friendly environment.
- Offer Unique Features: Differentiate your server with custom maps, mods, or unique gameplay mechanics.
- Grow Gradually: Start small and gradually expand as your community grows.
With patience and dedication, you can create a vibrant and engaging Minecraft community.
Hosting a Minecraft server opens up a world of possibilities for creativity and collaboration. By choosing the right type of server, selecting a reliable hosting provider, setting up and managing your server effectively, and growing your community, you can enjoy countless hours of fun with friends and fellow players.
Hosting a Minecraft server can be a rewarding experience, allowing you to create a custom gaming environment where you and your friends can explore, build, and play together. Whether you’re looking to host a small private server or something larger for a community, here’s how you can get started.
Choose Your Hosting Option
First, decide whether you want to host the server yourself or use a hosting service. Self-hosting gives you full control over the server settings and costs, while a hosting service handles most of the technical aspects for you. If you’re new to hosting, consider starting with a hosting service to simplify the process.
Self-Hosting
If you choose to self-host, you’ll need a computer that meets certain requirements. Minecraft servers require a powerful machine with a good internet connection. You’ll also need to ensure that your router supports port forwarding to direct traffic to your server.
Hardware Requirements
- Operating System: Windows, macOS, or Linux
- CPU: At least a quad-core processor
- RAM: Minimum 4GB, ideally 8GB or more
- Storage: SSD recommended for faster loading times
- Internet Connection: Stable and fast connection with at least 100 Mbps upload speed
Setting Up the Server
Once you have the hardware ready, download the Minecraft server software from the official Mojang website. Extract the files to a folder on your computer. Open the command prompt or terminal, navigate to the folder where you extracted the files, and run the server start-up script.
Port Forwarding
To allow others to connect to your server, you’ll need to set up port forwarding on your router. This involves directing incoming traffic on a specific port (usually 25565 for Minecraft) to your server’s IP address. Refer to your router’s manual for detailed instructions.
Server Configuration
Modify the server properties file to customize your server. You can change settings like the maximum number of players, server MOTD (message of the day), and difficulty level. For example, you might set max-players=20 to limit the number of players.
Using a Hosting Service
If self-hosting seems too complex, opt for a hosting service. These services offer easy setup and maintenance, often providing user-friendly control panels and support.
Selecting a Hosting Provider
- Cost: Look for plans that fit your budget. Some providers offer free tiers with limited features.
- Performance: Check the server specifications, including RAM and CPU power.
- Support: Opt for providers with responsive customer support.
- Location: Choose a provider with servers located close to your target audience to reduce latency.
Setting Up the Server
Most hosting services provide a web-based interface to configure your server. Simply log in, select your plan, and follow the on-screen instructions to set up your server. You can usually customize settings like server name, game mode, and plugins directly through the control panel.
Connecting to Your Server
Once your server is running, share the server IP address with your friends. They can join the server by entering the IP in the multiplayer menu within Minecraft. If you’re using a hosting service, the IP will be provided in your account dashboard.
Maintaining Your Server
Regularly update your server software to ensure security and stability. Monitor server performance and adjust settings as needed. Backup your world data frequently to prevent loss due to unexpected issues.
Choosing Plugins and Mods
To enhance your server experience, consider adding plugins or mods. These can introduce new gameplay mechanics, cosmetic changes, or even new dimensions. Popular plugins include EssentialsX for admin commands and WorldGuard for region protection.
Installing Plugins
For self-hosted servers, you can find plugins on websites like SpigotMC or BukkitDev. Download the plugin jar file and place it in the plugins folder within your server directory. Restart the server to load the plugin.
Installing Mods
Mods are more common in modded Minecraft servers. You can find them on sites like CurseForge. To install, you’ll typically need to use a mod loader like Forge or Fabric. Follow the installation instructions provided by the mod author.
Creating a Community
A successful server isn’t just about the technology; it’s about the people. Encourage a positive community by setting clear rules and fostering a welcoming environment. Regular events, like building contests or treasure hunts, can keep players engaged.
Community Engagement
- Discord: Set up a Discord server to facilitate communication among players.
- Rules: Establish clear guidelines for behavior to maintain a respectful community.
- Feedback: Regularly ask for player feedback to improve the server.
Building a Strong Community
Engage with your community by hosting regular events and encouraging player interaction. Recognize and reward active members to foster a sense of belonging. Over time, your server can grow into a vibrant, thriving community.
By following these steps, you can successfully host your own Minecraft server and create a fun, engaging environment for you and your friends. Whether you choose to self-host or use a hosting service, the key is to enjoy the process and keep your community at the heart of everything you do.
Setting up a Minecraft server can be an exciting way to bring friends together in a shared virtual world. Whether you’re looking to build a community or simply want to play with a close group, hosting your own server offers flexibility and control. Here’s how you can get started.
Choosing Your Server Software
First, decide which software you’ll use to run your Minecraft server. Bukkit, Spigot, and Forge are popular choices. Spigot is often recommended for beginners because it’s lightweight and has a wide range of plugins available to enhance gameplay. Forge, on the other hand, is great for modded servers, allowing players to install additional mods to expand the game experience.
Downloading the Server Software
Once you’ve chosen your server software, download it from the official website. For example, head over to the SpigotMC website to find the latest version of Spigot. Make sure to choose the correct version that matches your Minecraft server version. After downloading, unzip the file to a folder on your computer. This folder will become the home base for your server.
Installing the Server
To install the server, navigate to the folder where you unzipped the files. Open a text editor like Notepad and create a new file named server.properties. This file contains settings for your server, such as the difficulty level, game mode, and whether commands are enabled. Save the file in the same folder as your server files.
Next, run the server by double-clicking the start.bat (for Windows) or start.sh (for Mac/Linux) file in the folder. The first time you start the server, it will generate some essential files, including the world folder where the server saves the map data. Once the initial setup is complete, stop the server by closing the command window or terminal.
Configuring Your Server
After setting up the basic files, it’s time to configure your server. Open the server.properties file with a text editor. Adjust settings according to your preferences. For instance, change the difficulty to peaceful if you don’t want hostile mobs spawning, or set the game mode to creative for building-focused activities.
Consider also setting up a whitelist. This feature allows only players who have been manually added to your server’s list to join. It’s a good security measure, especially if you’re planning to host public servers. To enable the whitelist, set white-list=true in the server.properties file. Then, add player names to the whitelist.json file located in the config folder.
Installing Plugins
Plugins are extensions that add new features and functionalities to your server. For Spigot, you can find a plethora of plugins on websites like SpigotMC and DevBukkit. Download the plugin files, which usually come in .jar format, and place them in the plugins folder within your server directory.
Restart your server to load the plugins. You can manage these plugins using a plugin management tool or by editing their configuration files. For example, if you install a plugin like EssentialsX, it will add commands like /home and /spawn to help players navigate your server.
Optimizing Performance
To ensure your server runs smoothly, optimize its performance. One effective method is to allocate more RAM to the server. You can do this by editing the start.bat or start.sh file. Add a line like java -Xmx1G -Xms1G -jar spigot.jar nogui to set the maximum and minimum memory allocation. Adjust the number after -Xmx and -Xms based on your system’s capabilities and the number of players you expect.
Also, consider using a server management tool like Pterodactyl or MCServer. These tools provide a user-friendly interface to manage your server, including starting, stopping, and restarting it, as well as managing plugins and configurations.
Securing Your Server
Security is crucial when hosting a Minecraft server. Ensure your server is protected against unauthorized access. Change the default port from 25565 to something else to avoid easy targeting by hackers. You can change the port in the server.properties file under the server-port setting.
Implement strong passwords for admin accounts and regularly update your server software and plugins to patch any vulnerabilities. Additionally, consider using a firewall to block unwanted traffic. Most hosting providers offer built-in firewall options that you can configure to protect your server.
Hosting Options
If running a server locally isn’t feasible due to internet speed, power consumption, or noise levels, consider hosting your server with a dedicated hosting provider. Services like Aternos, Hostinger, and MinecraftHosting offer easy-to-use interfaces to set up and manage your server remotely.
When choosing a hosting provider, look for services that offer good uptime, fast performance, and responsive customer support. Many providers also offer customizable plans that allow you to scale resources based on your needs.
Connecting to Your Server
Once your server is up and running, share the IP address with your friends so they can connect. If you’re hosting the server locally, ensure your router is configured to forward traffic to your server. You can find detailed instructions on port forwarding on your router’s manual or the manufacturer’s website.
For a smoother experience, consider using a dynamic DNS service like No-IP or DynDNS. These services map your server’s IP address to a domain name, making it easier for players to connect even if your IP changes frequently.
With everything set up, invite your friends to join and enjoy building, exploring, and playing together in your custom Minecraft world!
Hosting your own Minecraft server can be a thrilling way to create a custom gaming experience for you and your friends. Whether you’re looking to build a community or simply want more control over your gameplay, setting up a server is easier than you might think. Here’s a step-by-step guide to help you get started.
Choosing the Right Hosting Option
Before diving into the technical details, you need to decide how you want to host your server. There are two main options: self-hosting and using a hosting service.
- Self-Hosting: This involves running the server on your own computer or a dedicated machine. It gives you full control but requires more technical knowledge and a stable internet connection.
- Hosted Server: Many companies offer Minecraft servers for rent. These services handle the technical aspects, leaving you free to focus on gameplay. They often come with features like backups, security measures, and support.
Setting Up a Self-Hosted Server
If you choose to self-host, follow these steps:
- Download the Minecraft Server Software: Head to the Minecraft website and download the latest version of the server software.
- Choose Your Hosting Device: Decide whether you want to run the server on your personal computer or a dedicated server. For a more reliable experience, consider renting a VPS (Virtual Private Server).
- Configure the Server: Once downloaded, navigate to the folder where you saved the server files. Double-click the
start.batfile to launch the server. You’ll need to configure settings in theserver.propertiesfile, such as setting the game mode, difficulty, and enabling PvP. - Port Forwarding: To ensure others can connect to your server, you need to set up port forwarding on your router. Typically, Minecraft uses port 25565. Consult your router’s manual for specific instructions.
- Start the Server: After configuring, start the server. You can do this by running the
start.batfile again. Your friends can now join by entering your IP address in the multiplayer menu.
Using a Hosted Server Service
If you opt for a hosted server, here’s what you need to do:
- Select a Hosting Provider: Popular choices include Apex Hosting, Shockbyte, and BisectHosting. Compare their features and pricing to find the best fit.
- Create an Account: Sign up for an account on the provider’s website. Follow the instructions to create a new server.
- Customize Your Server: Most providers offer a web-based interface where you can adjust settings, install plugins, and manage backups.
- Invite Friends: Once your server is set up, share the server IP with your friends. They can join through the Minecraft multiplayer menu.
Maintaining Your Server
Once your server is up and running, there are a few maintenance tasks to keep everything smooth:
- Regular Backups: Regularly back up your world files to prevent data loss in case of crashes or other issues.
- Security Measures: Implement security measures like firewalls and anti-cheat plugins to protect your server from unauthorized access.
- Updates: Keep your server software updated to benefit from the latest features and bug fixes.
- Community Management: Engage with your community by moderating chat and enforcing rules to ensure a positive environment.
Tips for a Successful Server
- Set Clear Rules: Establish and communicate clear guidelines for behavior and gameplay to avoid conflicts.
- Encourage Creativity: Provide tools and resources that allow players to express their creativity, such as building materials and creative modes.
- Host Events: Organize regular events like building contests or treasure hunts to keep players engaged.
- Be Accessible: Make yourself available to answer questions and address concerns from your players.
Hosting a Minecraft server is a rewarding endeavor that can enhance your gaming experience and bring together a community of players. With the right setup and ongoing management, you can create a thriving virtual world that everyone enjoys.
Conclusion
Hosting your own Minecraft server can be incredibly rewarding, offering a personalized gaming experience that brings friends and fellow players together. By choosing the right hosting provider and setting up your server correctly, you can ensure smooth gameplay and minimal lag. Remember to configure your firewall settings and port forwarding to keep your server secure and accessible. Regular updates and maintenance will keep your server running smoothly and protect it from potential threats. Whether you’re hosting a small community server or a large-scale public server, taking these steps will help you create a thriving virtual world for everyone to enjoy. With a bit of effort and dedication, you’ll be well on your way to becoming a respected server host in the Minecraft community. Your creativity and management skills will define the atmosphere of your server, so embrace the challenge and watch your community grow.