Crafting Green Dye in Minecraft: A Step-by-Step Guide
Exploring Natural Resources: Finding Lapis Lazuli and Cactus
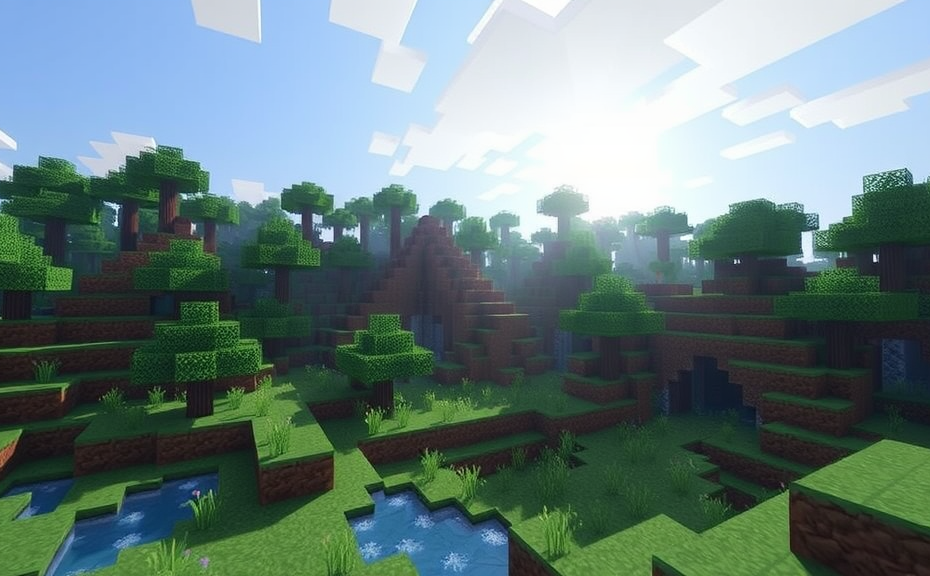
When you’re diving into the world of Minecraft, understanding how to gather and utilize natural resources is key to survival and success. Two essential items you’ll need for crafting various dyes are lapis lazuli and cactus. These resources can be found in different biomes and require some exploration and strategy to collect effectively.
Locating Lapis Lazuli
Lapis lazuli can be found in the form of lapis lazuli blocks within strongholds and end cities. However, the most common way to obtain it is by mining. Lapis lazuli ore generates in veins of 1–7 blocks and is commonly found between layers 0 and 29, with the highest concentration at layer 12. To find it, you’ll need to dig deep into the ground. A good method is to tunnel horizontally at layer 12, which increases your chances of encountering the ore. Additionally, you can use a stone pickaxe enchanted with Fortune to increase the amount of lapis lazuli you receive per block mined.
Tips for Mining Lapis Lazuli:
- Use a stone pickaxe or better for mining lapis lazuli ore.
- Focus your mining efforts around layer 12 for higher yields.
- Consider using Fortune enchantments to maximize your output.
- Explore strongholds and end cities for naturally occurring lapis lazuli blocks.
Gathering Cactus
Cactus is another crucial resource for making green dye. It naturally grows in desert and mesa biome types. Cacti grow on sand blocks and do not need light to grow. They only need a free space above them to grow. To harvest cactus, simply mine it with any tool or even your hands. Be cautious, though; cactus can damage you if you walk into it, so avoid standing still next to it. Cacti grow relatively quickly, so if you leave them alone, they can reach heights of up to three blocks tall.
Strategies for Gathering Cactus:
- Look for cacti growing in deserts and mesas.
- Ensure there’s no block above the cactus to allow growth.
- Mine cacti carefully to avoid damaging yourself.
- Leave cacti to grow taller for easier harvesting later.
Combining Lapis Lazuli and Cactus for Green Dye
Once you’ve gathered both lapis lazuli and cactus, you can combine them to create green dye. In the crafting table, place one cactus in any slot and one lapis lazuli in the adjacent slot. This combination results in a single unit of green dye. Green dye has multiple uses in Minecraft, including painting blocks and crafting fireworks. It’s also useful for breeding parrots and foxes.
Uses of Green Dye:
- Painting blocks and items.
- Creating fireworks.
- Breeding parrots and foxes.
Additional Tips for Efficient Resource Gathering
To streamline your resource gathering process, consider these additional tips:
- Always carry extra tools and weapons to prevent running out mid-mission.
- Map out your exploration routes to avoid getting lost.
- Store your resources in chests or shulker boxes to keep them organized.
- Utilize furnaces or campfires to smelt ores and cook food, saving valuable time.
- Enchant your tools and armor to increase efficiency and durability.
By mastering the art of finding and utilizing lapis lazuli and cactus, you’ll be well-equipped to craft green dye and enhance your gameplay experience. Remember, preparation and strategy are key to successful resource gathering in Minecraft. Happy crafting!
Advanced Techniques: Mixing Dyes for Unique Colors
In Minecraft, one of the most rewarding aspects of gameplay is the ability to customize your environment and gear with vibrant colors through dyes. While there are several basic dyes available, advanced players often seek to create unique hues to add more depth and creativity to their builds. This guide will walk you through some advanced techniques for mixing dyes to achieve a variety of custom colors.
To start, it’s essential to understand the base dyes and how they can be combined. Here are the primary dyes you can obtain:
- White dye
- Orange dye
- Magenta dye
- Lght blue dye
- Yellow dye
- Lime dye
- Pink dye
- Gray dye
- Light gray dye
- Cyan dye
- Purple dye
- Blue dye
- Brown dye
- Green dye
- Red dye
- Black dye
Creating Custom Colors
To mix dyes, place them in the crafting grid in the desired pattern. Each combination results in a unique color. Below are some combinations that yield beautiful shades:
Mixing Dyes for Unique Shades
Dark Green: Combine green dye with black dye.
Teal: Combine cyan dye with green dye.
Forest Green: Combine lime dye with green dye.
Emerald: Combine light blue dye with green dye.
Olive: Combine yellow dye with green dye.
Grass Green: Combine white dye with green dye.
Advanced Mixing Techniques
For even more control over the colors, consider these advanced techniques:
Layering Dyes
You can layer dyes on wool or other blocks to create gradients or subtle shifts in color. Place the first dye on the block, then use a different dye for the next layer. This technique works best with lighter colors over darker ones.
Dye Dilution
Want a lighter shade? Mix your dye with white dye. For example, to make light green, combine green dye with white dye. This dilution effect can be applied to any base color.
Color Intensification
To intensify a color, mix it with its complementary color. For instance, adding a bit of red dye to green dye can enhance the vibrancy of both colors. Experiment with different ratios to find the perfect balance.
Using Bones for Bone Meal
Bone meal, derived from bones, can be used to create white dye. It’s a versatile ingredient that can also be used to speed up plant growth. To make bone meal, smelt bones in a furnace to turn them into bone meal.
Once you have bone meal, you can mix it with other dyes to create softer tones. For example, mixing bone meal with green dye can produce a pastel green suitable for spring-themed builds.
Tweaking Colors with Redstone Dust
Redstone dust can be used to alter the hue of certain dyes. When mixed with green dye, redstone dust creates a slightly darker, more earthy green. This technique is particularly useful for creating aged or weathered appearances in your builds.
Practical Applications
Now that you know how to create unique colors, let’s explore some practical applications:
- Customized Armor: Dye leather armor to match your outfit or the theme of your build.
- Decorative Blocks: Use custom dyes to color wool, terracotta, or concrete blocks for intricate designs.
- Signage: Create custom signs with unique colors to label areas or convey messages.
- Landscaping: Use custom greens to create realistic grass, foliage, or water features.
With these advanced techniques, you can unlock a world of creative possibilities in Minecraft. Whether you’re building a sprawling cityscape or a cozy cottage, the ability to mix and match dyes allows for endless customization options. Happy crafting!
Redstone Integration: Automating Green Dye Production
In Minecraft, automating the production of green dye can significantly streamline your gameplay experience, especially when you’re deep into a project that requires large quantities of this essential item. By integrating redstone components into your setup, you can create an efficient and continuous flow of green dye. This guide will walk you through the process of setting up an automated green dye production system using redstone mechanics.
To begin, let’s understand the basic ingredients needed for making green dye: cactus green and bone meal. Cactus green is derived from cacti, while bone meal comes from bones broken down with a grindstone or by smelting bones in a furnace. Once you have these materials, you can combine them to craft green dye. The key here is to automate the collection and processing of these ingredients.
Step 1: Setting Up the Cactus Farm
Start by creating a cactus farm. Cacti grow on sand blocks and do not require water or light. To automate this, place hoppers under each cactus to collect the cactus greens as soon as they drop. Surround the cacti with fences to prevent mobs from destroying them. Ensure there’s a water flow system nearby to transport the collected cactus greens to a storage chest.
Step 2: Bone Meal Production
For bone meal, you need to set up a mob grinder to efficiently kill skeletons. Skeletons drop bones which can be converted into bone meal using a grindstone or furnace. Place hoppers beneath the grinder to automatically collect the bones. Connect these hoppers to a storage chest to keep the bones organized and ready for processing.
Step 3: Combining Ingredients
Once both cactus green and bone meal are collected, you need to combine them to make green dye. Set up a series of chests containing cactus green and bone meal near a crafting table. Use droppers to feed these ingredients into the crafting table. A redstone comparator can detect when the crafting table has enough ingredients and trigger the production of green dye. The green dye can then be collected in a hopper below the crafting table.
Step 4: Redstone Mechanics
To ensure the system runs smoothly, integrate redstone mechanisms. Use redstone torches and repeaters to control the flow of items between chests, hoppers, and the crafting table. Redstone comparators can monitor the levels in chests and activate pistons to open or close paths for items. This ensures that the system only activates when there are sufficient resources available.
Step 5: Expanding Your System
As your needs grow, consider expanding your setup. Add more cactus farms and mob grinders to increase output. Utilize hoppers and chests to distribute resources evenly across multiple crafting stations. Redstone comparators can be used to regulate the flow, ensuring that each station receives the necessary ingredients without overloading any single path.
Step 6: Maintenance and Optimization
Regularly check your system for any blockages or issues. Clear out hoppers and chests if they become full. Optimize the placement of redstone components to reduce lag and ensure smooth operation. Consider adding additional storage solutions like shulker boxes to manage larger volumes of materials efficiently.
By integrating redstone into your green dye production setup, you can achieve a high level of automation that saves time and resources. This streamlined approach allows you to focus on other aspects of your Minecraft world while maintaining a steady supply of green dye. Experiment with different configurations and layouts to find the most efficient setup for your needs. Happy crafting!
Troubleshooting Common Issues When Making Green Dye
When you’re diving into the world of Minecraft, crafting green dye can sometimes present a few hurdles. Whether you’re a seasoned player or just starting out, encountering issues with making green dye can be frustrating. Here’s a guide to help you troubleshoot common problems so you can get back to enjoying the game.
One of the most common issues players face when trying to make green dye is simply not having the right ingredients. To craft green dye, you need cactus green and bone meal. Cactus green is made by smelting cactus in a furnace, while bone meal is crafted from bones found in the game. Make sure you have these items before attempting to mix them.
Step-by-Step Guide
- Gather Cactus: Find cacti growing in desert or savanna biomes. Be careful, as they can damage you when touched.
- Smelt Cactus: Place the cactus in a furnace to turn it into cactus green. You’ll need to wait for the process to complete.
- Collect Bones: Hunt skeletons or find bones scattered around the game world.
- Craft Bone Meal: Place the bones in a crafting table to convert them into bone meal.
- Mix Ingredients: Place one unit of cactus green and one unit of bone meal in the crafting grid to create green dye.
Common Problems and Solutions
- Missing Ingredients: Double-check your inventory for both cactus green and bone meal. If you’re missing either, head out to gather more. Cacti are easy to spot in their natural habitats, and bones can often be found near the graves of zombies and skeletons.
- Incorrect Crafting Grid Layout: Ensure you place the cactus green and bone meal in the correct positions within the 2×2 crafting grid. Incorrect placement can lead to failed attempts.
- Not Enough Space: Make sure your inventory has enough space for the new green dye. If your inventory is full, move items to your chest or drop them on the ground temporarily.
- Furnace Not Working: If you’re struggling to smelt cactus, ensure your furnace is fueled. Coal, wood, and other combustible materials can be used to power the furnace.
- Bones Not Converting: Verify that you are using the correct recipe to convert bones into bone meal. Using the wrong method can prevent the conversion.
If you encounter any of these issues, take a moment to review your steps and ensure you’ve followed the process correctly. Sometimes, a simple mistake can lead to frustration, but with a bit of patience and attention to detail, you’ll be able to overcome these obstacles.
Troubleshooting Tips
- Check Your Inventory Regularly: Keep track of your resources to avoid running out of necessary items mid-project.
- Stay Organized: Use chests to store excess materials and keep your inventory clean. This makes it easier to locate what you need quickly.
- Explore Different Biomes: Cacti and skeletons can be found in various biomes, so don’t limit yourself to just one area.
- Ask for Help: If you’re stuck, consider asking friends or fellow players for advice. Sometimes a fresh perspective can help solve the problem.
- Review Tutorials: Watch videos or read guides online to see step-by-step demonstrations of the process. Visual aids can often clarify complex steps.
Remember, troubleshooting is part of the learning process in Minecraft. Each issue you solve brings you one step closer to mastering the game. So, embrace the challenges, and enjoy the journey of discovery and creation that Minecraft offers.
Additional Resources
- Minecraft Wiki: Green Dye
- YouTube Tutorials: Making Green Dye
- Reddit Discussions: How to Make Green Dye
By keeping these tips in mind, you’ll be well-equipped to handle any issues that come your way when making green dye. Happy crafting!
Conclusion
Mastering the art of making green dye in Minecraft opens up a world of creative possibilities. Whether you’re crafting by hand or automating your production with Redstone, each method brings its own unique advantages. By exploring natural resources like lapis lazuli and cactus, you can gather the essential ingredients needed for this vibrant hue. Advanced techniques such as mixing dyes offer even more customization options, allowing you to experiment and discover new colors. Remember, troubleshooting common issues ensures smooth gameplay and successful dye-making. With these skills, you’re well-equipped to enhance your Minecraft experience, whether you’re decorating your base, creating stunning landscapes, or simply expanding your crafting repertoire. Enjoy the process and let your creativity flourish!