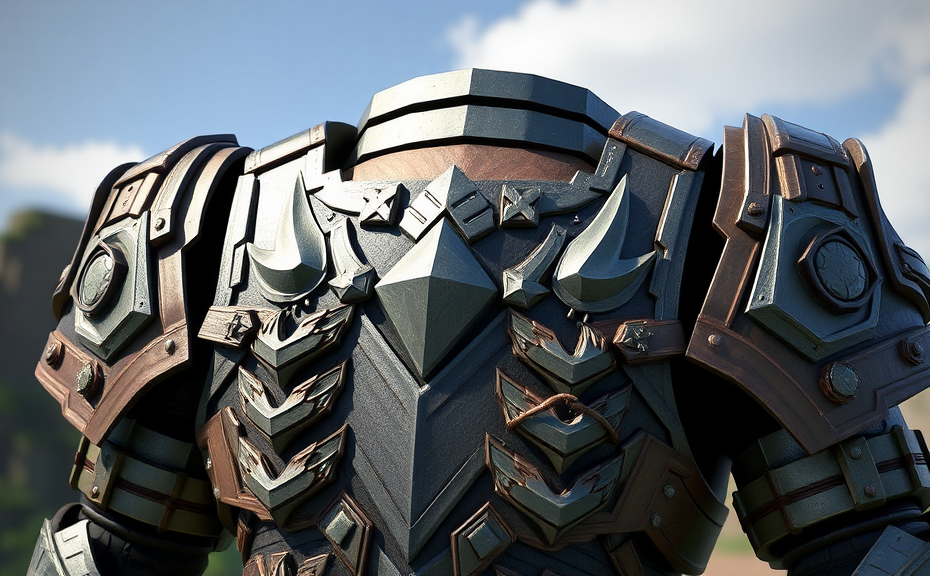
Minecraft has become a vast playground for creativity, offering players countless ways to personalize their gaming experience. One of the recent additions to enhance customization is the introduction of armor trims. Armor trims are decorative elements that can be added to your armor pieces, giving them a unique look and feel. These trims are not just for aesthetics; they also reflect your character’s profession and achievements within the game. In this guide, we’ll dive into everything you need to know about Minecraft armor trims, including how to obtain them, apply them, and use them effectively.
To start with, armor trims are essentially patterns that can be applied to your armor. They come in various designs, each associated with different professions like Farmer, Fisherman, Fletcher, and more. To get these trims, you first need to craft a grindstone, which is essential for applying trims to your armor. Once you have a grindstone, locate a smithing table, which is where the magic happens. The smithing table requires two main components: the armor piece you want to trim and the trim pattern. Trim patterns can be crafted using copper ingots, which need to be smelted from copper blocks. Additionally, you’ll need one leather for each trim pattern crafted.
Obtaining Trim Patterns
Trim patterns are crafted using a crafting table. To make one trim pattern, you need four copper ingots and one leather. Place the copper ingots in a 2×2 grid, and put the leather in the center. This will yield one trim pattern. You can then use this trim pattern at the smithing table to add a unique design to your armor. Each trim pattern has a distinct appearance, so choose wisely based on your preference and the type of armor you’re modifying.
Applying Armor Trims
To apply a trim, place the armor piece you want to modify in the bottom slot of the smithing table. Then, place the trim pattern in the top slot. The result will be a beautifully decorated armor piece that reflects your chosen profession or simply adds a personal touch. It’s worth noting that you can apply multiple trims to the same armor piece, allowing for even greater customization.
Exploring Different Trim Designs
There are numerous trim designs available in Minecraft, each with its own unique style. Some popular designs include the Farmer’s Trim, which features a wheat pattern, and the Fisherman’s Trim, adorned with fish motifs. These designs not only add flair to your armor but also serve as indicators of your character’s profession. For example, wearing a Farmer’s Trim might suggest you’re skilled in farming, while the Fisherman’s Trim indicates expertise in fishing.
Using Armor Trims in Survival Mode
In Survival mode, armor trims can be particularly useful. Not only do they enhance the visual appeal of your gear, but they can also boost your character’s reputation among villagers. Villagers may react positively to players wearing trims that match their professions, potentially leading to better trade deals or other perks. This adds a layer of depth to gameplay, encouraging players to explore different professions and gather resources to craft corresponding trim patterns.
Tips for Maximizing Armor Trim Usage
- Experiment with Different Combinations: Try out various combinations of trims and armor types to find the perfect look for your character.
- Collect Multiple Trim Patterns: Having a variety of trim patterns allows for greater flexibility in customizing your armor.
- Utilize Trim Tables: Make use of the grindstone and smithing table to efficiently apply trims to your armor.
- Explore Villager Reactions: Observe how villagers react to your trimmed armor, which can lead to interesting interactions and rewards.
Minecraft armor trims offer a fantastic way to customize your character’s appearance and add a professional touch to your armor. By understanding how to obtain and apply these trims, you can significantly enhance your gaming experience. Whether you’re aiming for a stylish look or seeking practical benefits in Survival mode, armor trims provide endless possibilities for personalization. So, grab your grindstone, gather some materials, and start crafting those unique armor designs today!
Minecraft players love customizing their characters, and one of the most exciting ways to do this is through armor trims. Armor trims are decorative additions that can be applied to various pieces of armor in the game, enhancing both the look and the functionality of your gear. These trims were introduced in Minecraft 1.17, adding a new layer of customization and personalization for players.
To get started with armor trims, you need to gather the necessary materials. You’ll need to find blocks of copper, which can be smelted from raw copper found underground. Once you have enough copper, you can craft a copper ingot. With the ingot in hand, you can then create a copper block. When a copper block is exposed to weather, it oxidizes over time, turning green. This oxidation process is key to obtaining the different types of trims.
There are three main types of trims you can create: Waxed, Weathered, and Antiquated. Each type has its own unique appearance and can be applied to different armor pieces. To get a Waxed Trim, you need to place a copper block under a water bucket. This prevents the block from oxidizing and keeps it shiny. Weathered Trims occur naturally when a copper block is left exposed to the elements. Antiquated Trims can be achieved by using a bone meal on a weathered trim, giving it a more aged look.
Once you have the desired trim, you can apply it to your armor. To do this, you need to craft a trim kit using the copper block and a few other ingredients. The trim kit can then be used on any piece of leather armor or netherite, gold, iron, and diamond armor. Applying the trim is simple: just place the trim kit in the crafting table along with the armor piece you want to decorate.
Armor trims not only enhance the aesthetic appeal of your gear but also provide some functional benefits. For example, leather armor with a trim can gain additional durability and protection. Additionally, applying a trim can sometimes unlock special enchantments or effects, making your armor even more powerful in the game.
One of the best ways to showcase your armor trims is during community events or competitions within Minecraft. Many servers host events where players can show off their customized armor. These events are great opportunities to meet other players and share tips on how to create the most impressive trims. Participating in these events can also earn you recognition and rewards within the community.
If you’re looking to take your armor customization to the next level, consider combining trims with other modifications. For instance, you can dye your leather armor before applying a trim to create a unique color combination. Another strategy is to mix and match different types of trims across your armor set. This can lead to some truly eye-catching and personalized outfits.
- Gather raw copper and smelt it into a copper ingot.
- Craft a copper block from the ingot.
- Expose the copper block to the elements to oxidize it.
- Apply a Waxed Trim by placing the block under water.
- Use bone meal to create an Antiquated Trim.
By following these steps, you can create a wide variety of armor trims and apply them to your gear. Whether you’re aiming for a sleek, modern look or something more vintage and rustic, there’s a trim out there that fits your style. Experimenting with different combinations can help you discover new and exciting looks for your character in Minecraft.
Minecraft armor trims add a new dimension of creativity and personalization to the game. They allow players to express themselves through their in-game avatars and enhance the overall gaming experience. So, why not give it a try? Gather your materials, craft some trims, and see how they can transform your armor into a masterpiece. Happy crafting!
Minecraft, the beloved sandbox game, offers players a vast world filled with creativity and exploration. One of the game’s recent updates introduced armor trims, adding a new layer of customization and aesthetic appeal to player gear. Armor trims allow players to personalize their armor sets, making each piece unique and enhancing the visual aspect of their character.
To unlock armor trims in Minecraft, you first need to obtain a grindstone. Grindstones can be crafted using six wooden planks and one stone slab. Once you have a grindstone, you can use it to apply trims to your armor by placing the armor piece in the grindstone slot and selecting the desired trim pattern. There are several trim patterns available, including Cobble, Chiseled, Cut, and many more. Each pattern adds a distinct design to the armor, allowing for endless customization options.
Trim patterns can be unlocked by completing certain advancements. For example, to unlock the Cobble Trim, you need to complete the advancement “Grind Everything,” which requires you to use a grindstone on various items. Similarly, other patterns like the Chiseled Trim require different advancements, such as “Masterful Crafting.” These advancements encourage players to explore and engage with the game’s mechanics, leading to a more immersive experience.
Once you have unlocked a trim pattern, you can apply it to any piece of leather, chainmail, iron, gold, or diamond armor. The process is straightforward: place the armor piece in the grindstone, select the desired trim pattern, and the armor will be updated with the chosen design. The trim patterns add a subtle yet noticeable change to the armor, making it stand out and giving players a sense of accomplishment when customizing their gear.
- Cobble Trim: Adds a basic yet elegant design to your armor.
- Chiseled Trim: Features intricate lines that give a refined look.
- Cut Trim: Offers a bold and modern aesthetic to your armor set.
The addition of armor trims also ties into the game’s overall theme of customization. Players can now express their creativity not only through building structures and farms but also through their characters’ appearances. This feature encourages players to experiment with different combinations of armor and trims, leading to a more personalized gaming experience.
Armor trims also play a role in the game’s lore and story. They are inspired by real-world materials and techniques, blending fantasy with reality. For instance, the Cut Trim is reminiscent of modern industrial designs, while the Chiseled Trim draws inspiration from ancient architectural styles. This blend of aesthetics adds depth to the game’s universe, making it more engaging for both casual and hardcore players.
In addition to the visual appeal, armor trims can also be used strategically. By choosing specific patterns, players can create a cohesive look for their entire character, making them stand out in multiplayer games or in their own single-player worlds. The ability to customize armor not only enhances the gameplay experience but also provides a sense of achievement and personal satisfaction.
Players can further enhance their armor sets by combining trims with enchantments. Enchanting armor pieces can increase their durability, protection, or magical properties, making them even more valuable in combat situations. Combining a Cut Trim with a powerful enchantment like Protection IV can result in a visually stunning and highly effective armor set.
Minecraft’s armor trims are a testament to the game’s commitment to providing players with a rich and customizable experience. From unlocking new patterns to applying them to your armor, the process is both fun and rewarding. Whether you’re a seasoned player looking to spice up your character’s appearance or a newcomer eager to dive into the game’s mechanics, armor trims offer a fantastic way to personalize your gear and enhance your overall gaming experience.
Armor trims in Minecraft add a new dimension to the game’s already expansive world. They provide players with the tools to create unique and personalized characters, encouraging creativity and exploration. As you embark on your journey in the Minecraft universe, don’t forget to experiment with different trim patterns and see how they can transform your armor into something truly special. Happy crafting!
Minecraft has become more than just a game; it’s a world where creativity knows no bounds. One of the recent additions to enhance this creative experience is the armor trims system. Armor trims add a layer of customization and aesthetic appeal to your character’s gear, making your builds stand out even more.
To get started with armor trims, you first need to gather the necessary materials. The core ingredient is the trim material, which can be obtained by smelting blocks of copper, gold, iron, amethyst, or netherite scrap in a furnace. Once you have the trim material, you’ll need to find a grindstone. The grindstone is essential for applying trims to your armor. Place your armor on the grindstone and select the trim material you want to apply. Each type of trim material gives a different look, so choose wisely based on your style preferences.
One of the most exciting aspects of the armor trims system is the ability to mix and match different types of trims. For example, you can apply a gold trim to a chestplate and an iron trim to leggings, creating a unique combination that reflects your personal taste. Mixing trims isn’t just about aesthetics; it can also help you identify different sets of armor in multiplayer games, making it easier to coordinate with friends.
Another feature that adds depth to the armor trims system is the ability to dye your armor. After applying a trim, you can dye your armor to any color you like. This process involves placing your trimmed armor in a cauldron filled with water and then adding dye. You can use various dyes, including those made from flowers, bones, and even squid ink, to achieve the exact shade you desire. Dyeing your armor allows you to further customize your look and blend seamlessly into any environment.
The armor trims system also offers a variety of patterns to choose from. These patterns range from simple lines to intricate designs, giving you a wide array of options to personalize your armor. Each pattern can be applied to any type of armor, whether it’s a helmet, chestplate, leggings, or boots. Experiment with different combinations to find the perfect look for your character. Whether you prefer a sleek, modern design or something more ornate and traditional, there’s a pattern to suit every style.
For those who enjoy building and designing, the armor trims system opens up new possibilities. You can create entire sets of armor with matching trims and colors, making your builds more cohesive and visually appealing. This system encourages players to think beyond basic functionality and focus on the overall aesthetic of their creations. It’s a fantastic way to add flair to your Minecraft world, whether you’re building a fortress, a village, or simply exploring the vast landscapes.
In multiplayer servers, the armor trims system can also be a fun way to show off your creativity and skills. You can create custom armor sets and share them with other players, sparking conversations and inspiring others to try out new combinations. The system fosters a sense of community and collaboration, encouraging players to explore and experiment together.
The armor trims system in Minecraft is a powerful tool for customization and creativity. It adds a new dimension to the game, allowing players to express themselves through their characters’ gear. Whether you’re a seasoned player looking to enhance your builds or a newcomer eager to personalize your experience, the armor trims system offers endless possibilities. So, grab your grindstone, gather some trim materials, and start crafting your perfect set of armor today!
Remember, the key to mastering the armor trims system lies in experimentation and creativity. Don’t be afraid to mix and match different trims, patterns, and colors. With a little practice, you’ll soon be creating unique and stunning armor sets that will make your builds shine. Happy crafting!
If you’re looking for more tips and tricks on how to enhance your Minecraft experience, consider checking out online forums and communities. These platforms are great resources for finding inspiration and sharing ideas with fellow players. Whether you’re building a medieval castle, a futuristic city, or a serene village, the armor trims system can help bring your vision to life.
Keep an eye out for updates and new features in Minecraft. The game is constantly evolving, and new additions to the armor trims system could be just around the corner. Stay engaged with the community and keep your creative juices flowing. Who knows what amazing designs you’ll come up with next?
Minecraft has evolved into a vast universe filled with endless possibilities, and one of the latest additions that has captured the imagination of players is armor trims. These elegant designs add a touch of sophistication to your in-game armor sets, allowing you to customize your look and express your personal style. Whether you’re a seasoned Minecraft veteran or a newcomer looking to enhance your gaming experience, understanding how armor trims work can elevate your gameplay and make your adventures even more enjoyable.
To unlock armor trims in Minecraft, you need to find a grindstone. Grindstones are crafted using two sticks and three planks, and they can be found in various structures like villages, shipwrecks, and woodland mansions. Once you have access to a grindstone, you can apply trims to your armor by combining them with a trim pattern and a trim material. Trim patterns come in different shapes and styles, while trim materials offer a variety of colors and textures. By experimenting with different combinations, you can create a unique look that suits your character’s personality.
Exploring Trim Patterns and Materials
Trim patterns play a crucial role in defining the overall aesthetic of your armor. They come in several shapes, including Horn, Coiling, Quill, Wave, Snout, and Rampant. Each pattern brings its own flair to your armor, so choosing the right one depends on your personal preference and the type of character you want to portray. For example, the Horn pattern might suit a knightly character, while the Snout pattern could be ideal for a character inspired by underwater creatures.
Trim materials, on the other hand, determine the color and texture of the trims. You can obtain these materials by trading with villagers, looting shipwrecks, or finding them scattered around the world. There are numerous trim materials available, each offering a distinct look. For instance, Iron Ingots yield a sleek, metallic finish, while Gold Ingots provide a more luxurious appearance. Exploring these options allows you to fine-tune your armor’s appearance and make it truly your own.
Customizing Your Armor Set
Once you have your trim patterns and materials, you can start customizing your armor set. Start by selecting the pattern that resonates with your character concept. Then, choose a trim material that complements the overall design. Applying the trim to your armor is straightforward—simply place the armor piece, the trim pattern, and the trim material in the grindstone crafting grid. The game will automatically apply the trim to the armor, transforming it into a masterpiece.
You can mix and match different patterns and materials to create unique combinations. For example, combining the Horn pattern with a Diamond Trim Material can give your armor a regal and powerful look, perfect for a warrior king. Alternatively, pairing the Quill pattern with a Netherite Trim Material can result in a rugged and adventurous appearance, fitting for an explorer or adventurer.
Tips for Creating Stunning Armor Trims
- Experiment with Combinations: Don’t be afraid to try out different patterns and materials. Mixing and matching can lead to unexpected and beautiful results.
- Consider the Context: Think about the environment and role of your character when choosing patterns and materials. This will help ensure that your armor looks cohesive and fits the narrative.
- Pay Attention to Detail: Small adjustments in trim placement can significantly impact the final look. Take your time to position the trims precisely for the best effect.
- Keep It Balanced: Avoid overloading your armor with too many trims. A balanced approach often yields the most visually appealing results.
Armor trims are not just about aesthetics; they also serve a practical purpose. In certain game modes, such as Bedrock Edition, armor trims can be used to identify players who have completed specific challenges or achievements. This adds an extra layer of depth to the customization process, making it both fun and rewarding.
Community Creations and Inspiration
The Minecraft community is incredibly creative, and many players share their armor trim designs online. Platforms like YouTube, Reddit, and Instagram are great places to find inspiration. Watching tutorials and browsing through galleries can provide valuable ideas and techniques for your own creations. Engaging with the community can also be a fun way to get feedback and share your designs, fostering a sense of camaraderie among players.
Sharing your creations can also be a source of motivation. Seeing others appreciate your work can boost your confidence and inspire you to push the boundaries of what you thought was possible. Whether you’re creating armor for yourself or designing costumes for a server event, there’s no limit to what you can achieve with armor trims.
Armor trims in Minecraft offer a fantastic way to personalize your character and enhance your gaming experience. By exploring different patterns and materials, you can create a unique look that reflects your creativity and style. Whether you’re aiming for a majestic knight, a daring explorer, or anything in between, the possibilities are endless. So grab your grindstone, gather some trim patterns and materials, and start crafting your dream armor today!
Conclusion
Minecraft armor trims offer a fantastic way to customize your gear and stand out in the vast world of Minecraft. Whether you’re looking to add a touch of elegance with gold or make a bold statement with amethyst, these trims provide endless possibilities. With the right combination of resources and a bit of creativity, you can craft armor that reflects your unique style and helps you tackle any challenge. Remember, the key to success lies in gathering the necessary materials and understanding how each trim impacts your armor’s durability and enchantability. So, dive into the game, experiment with different designs, and let your imagination run wild. With armor trims, the only limit is your creativity!